Well, I think we can finally say it’s all down hill from here.
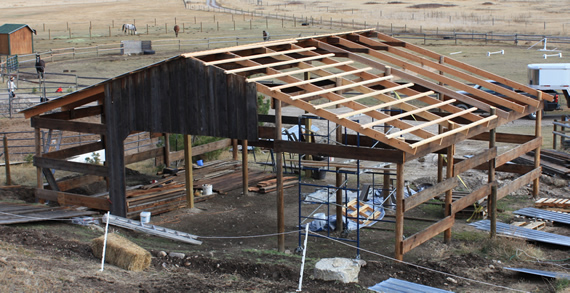
When I started on this Epic Barn Project, I thought getting the poles all straight and perfectly placed was the hardest part of this barn. Then when I go to the roof, I thought that was the hardest part (as I’ll explain below). Now that we have completed those two difficult tasks, we only have walls left. These walls consist of 2×12 boards nailed vertically to the “cross beams”. Thankfully that doesn’t take a lot of thinking, measuring or calculating to make sure it’s absolutely perfect. We may run into a couple difficult spots (where the rafters come out of the wall for example), but I think it will be easy peasy lemon squeezy compared with trying to calculate where all the roof purlins go… explained below.
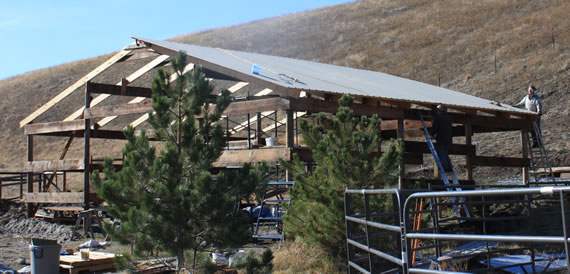
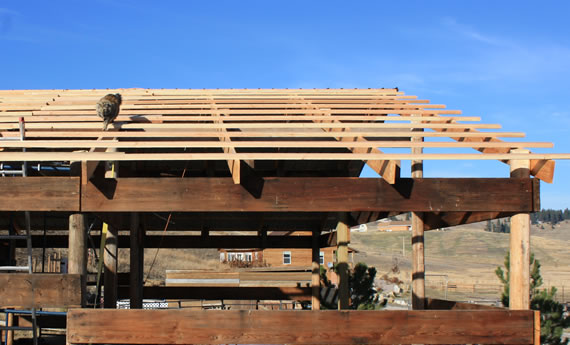
Putting up the Second 1/2 Roof
Pretty much all of the material we are using for the Epic Barn Project (including the tin roof) came from our neighbor’s barn. It was just as cool as my barn, but I don’t call it an epic barn because I didn’t build it ;).
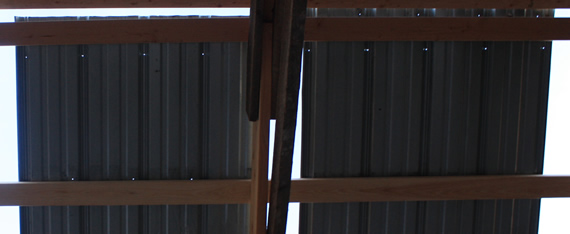
Since the roof tin has already been used on a barn, all of the screw holes have already been drilled through the tin. We got very lucky on this first roof because most of the holes were the same distances from each other and lined up with the purlins (wooden 2x4s we screw the roof to). There was only one small area where the purlins and holes didn’t line up.
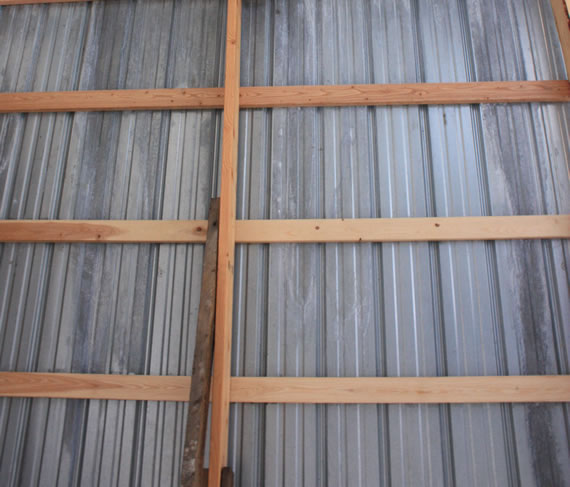
Unfortunately, the other roof was very sloppy. The holes were all over the place because the old purlins were not perfectly lined up. Even the length of the roofing varied by up to 5 inches!
In this picture you can see that the holes on the top line up with each other, but the length of the tin extends much farther and the second set of holes (bottom) don’t match up either.
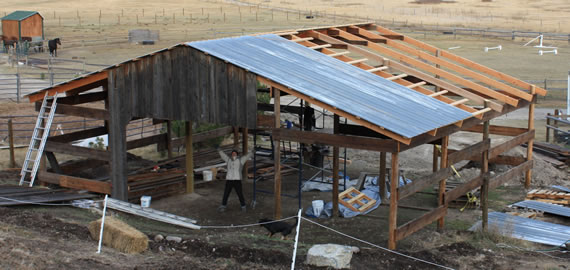
So I had to measure every roof tin, put the measurements into excel and put them all in the proper order. Then I had to calculate where the purlins would have to go to match up with all of the holes. Here’s the first half of the purlins: (You can also see the progress on the “West Gable”)
Do you see any holes? *SHAZAM* I didn’t think so!
Ashton and Anna are very happy that Ashton lined up all the holes correctly. Here’s the first four pieces of roofing:
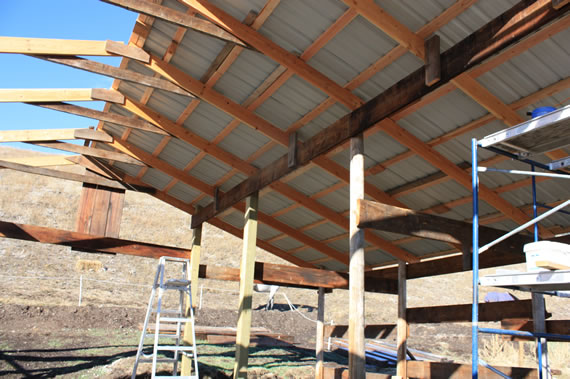
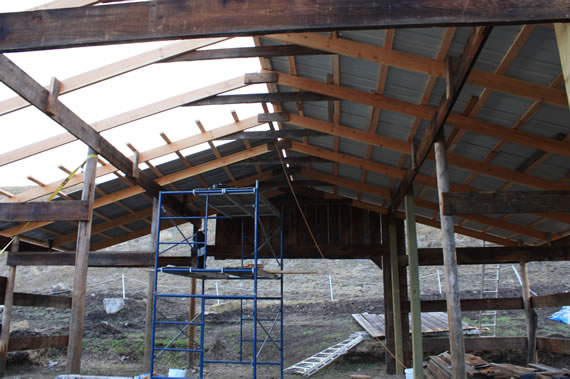
Here’s a behind the scenes look inside the construction site. Buddy lent me the scaffolding. What a huge time-saver. You can also see the rest of the West Wall waiting to be put up.
Funny Story:
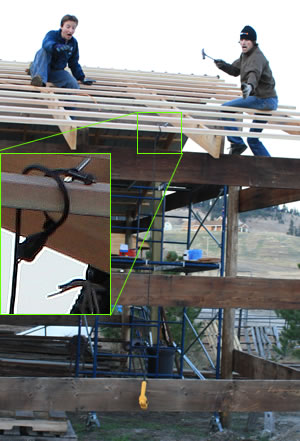
While we were hammering/screwing in the purlins, Carol’s electric drill (that she’s kindly letting us borrow) fell off the roof. Amazingly the end of the drill’s cord managed to grapple itself onto one of the 2x4s.
It’s kind of tough to see in this picture, but the yellow, DeWalt Drill is hanging from the last purlin by the little rubber strap that holds the drill tightener/loosener… What is that thing called anyway?
Yes, Donald and I reenacted the dropping of the Drill for this photo. =)
The next Day, Mocha helped inspect our roofing job to make sure we had enough nails and screws.
Here’s really the only recent pics I have of the fabulous help we’ve gotten from our friends this week: Donald, Casey and Carol.
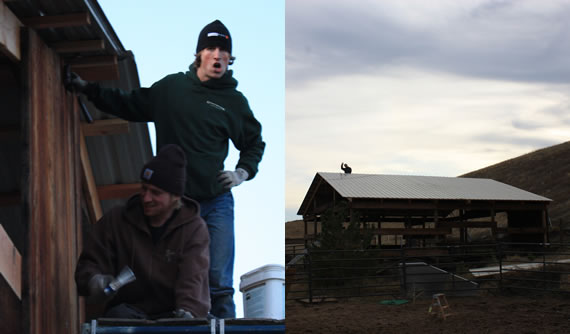
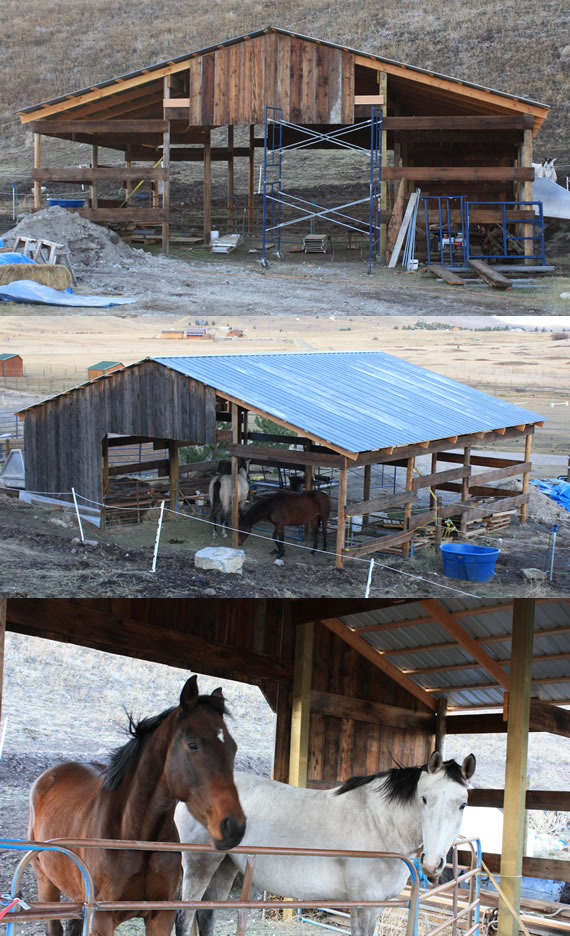
Yeay! We completed the Epic Barn Roof! Anna also let the horses in there since it was supposed to rain a lot today. Here’s the horses checking out how the Epic Barn Project is coming along:
Thanks for reading.
AshtonAnna
(Btw. If you put your email address in the top left of the page (to subscribe to our Blog), the system will email you every time we make a new post!)
One reply on “Epic Barn Project – Roof Completed”
This is so awesome. Ashton, I think I know where the perfectionist characteristic came from! Anna, you are much loved. He knows how to show it!